How To Append a TimeStamp To Each File Downloaded From Another Server
Learn how to append a timestamp to each file downloaded from an external server in an automated file transfer.

Overview
Whenever we download files from an external server on a regular basis, we often like to rename each file so that they follow a certain format. This would make it easier for us to group, sort or manage them whenever the need arises. One common practice is to append a timestamp at the end of the filename. This article will teach you how to automate the entire process using JSCAPE MFT Server Triggers.
What we're trying to do
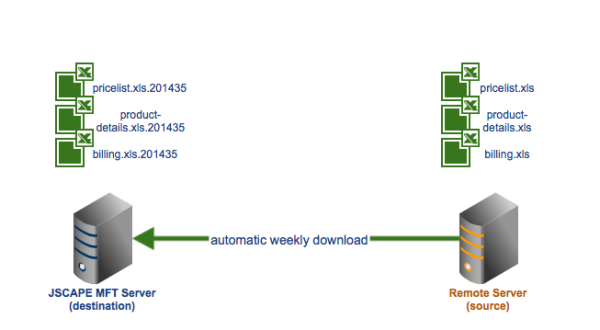
Note:The trigger event we're about to use, External File Download, fires each time a trigger action downloads a file and then stores it locally. That means, you'll need to have an existing trigger that already has that kind of trigger action. One example is the trigger we created in the article Scheduling an Automated File Transfer for Files Matching a Regex. I encourage you to review that article first so you can better appreciate what's going on here.
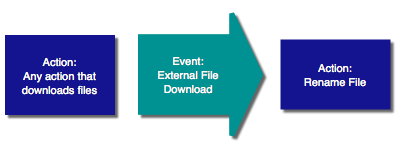
Find it interesting? Learn how to do it
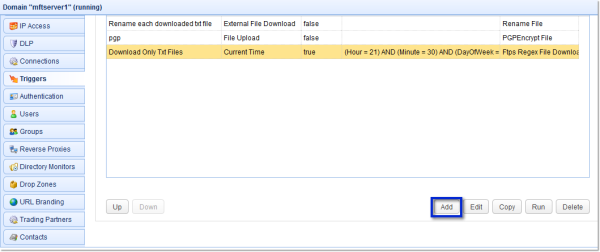
Go to the Triggers module and then click the Add button.
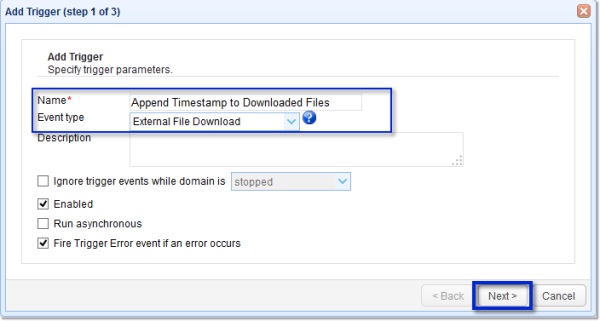
Give the trigger a name (e.g. "Append Timestamp to Downloaded Files") and then select External File Download from the Event type drop-down list.
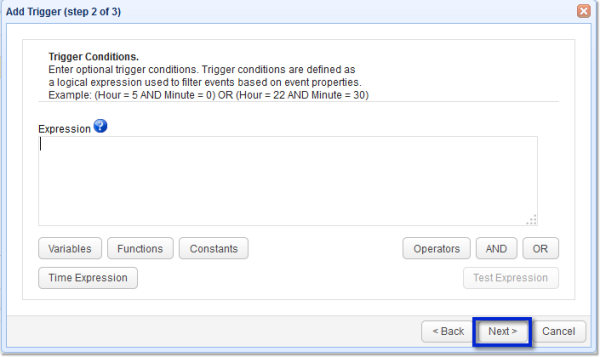
Click the Next button to proceed.
Just click the Next button again in the succeeding screen.
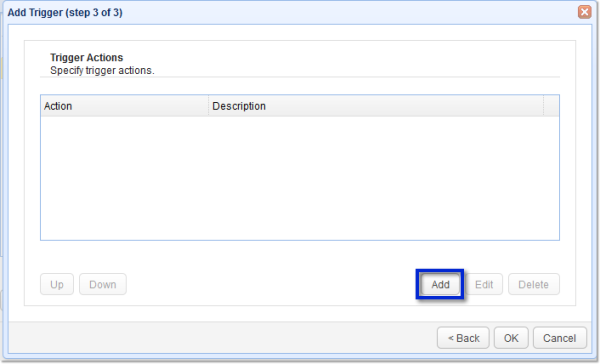
Create a trigger action by clicking the Add button.
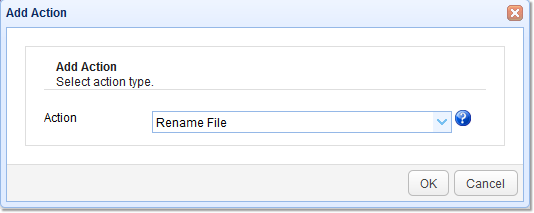
Now, select Rename File from the Action drop-down list.
This trigger action has two main parameters:
File - the file you want to rename
and
Destination File - the name you want to change that file's name to
Because both parameters require you to specify file paths, it is usually easier to just use the %LocalPath% variable. This variable contains the local path of the file JSCAPE MFT Server recently downloaded.
If the preceding trigger action downloads multiple files (just like the trigger action we used in the article Scheduling an Automated File Transfer for Files Matching a Regex"), the External File Download event will fire for every file that's downloaded. So if 100 files are downloaded, then the External File Download event will likewise fire 100 times. Consequently, the Rename File trigger action will also execute a hundred times. Each time it executes, %LocalPath% will have a different value.
In our example, we're simply going to rename each file using the current filename, plus the current Year and then the current Week of the year. These values are stored in the %Year% and %WeekOfYear% variables respectively.
For example, if the filename is mydocument.txt, then that may be renamed to mydocument.txt.201435, wherein 35 means the download occured on the 35th week of the year 2014.
Here's how we do that:
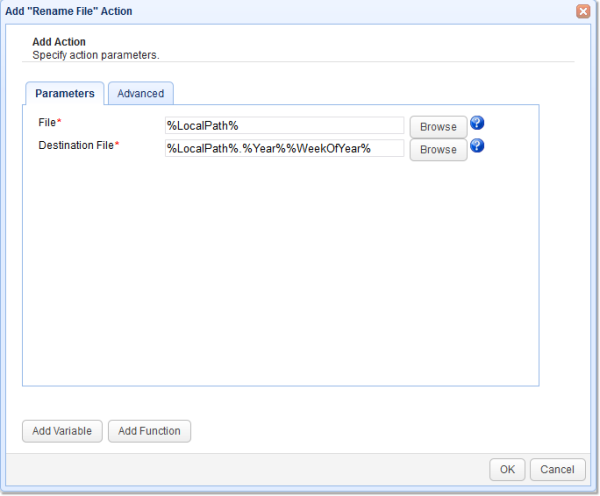
There are several other variables in there which you can use and append to your filename. Just click the Add Variable button. You can even use several functions to customize your filename even further. Just click the Add Function button to choose from a collection of built-in functions.
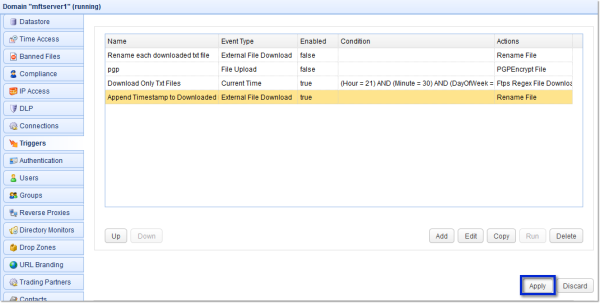
Once you're done, click the OK button. Click each OK button you encounter until you get back to the main screen. Assuming everything's alright, you should be able to see your newly created trigger in your list of triggers.
Click the Apply button to complete the trigger creation process.
That's it. If you want to try this out yourself, you can download the free evaluation edition of JSCAPE MFT Server. Just click the download link below.